
The Shiner features adjustable energy levels to match your body's sensitivity and Pulse 4.0 IPL technology for visible results in two weeks and four sessions. Regular usage maintains smooth, flawless skin. Once exclusive to salons, Pulse 4.0 Technology now boosts our device's efficiency by 80%, providing long-lasting results and the convenience of salon-quality hair removal at home.
Hair thickness, skin tone, hair-skin color contrast, and growth rate vary among individuals, affecting session frequency.
For optimal results in two months, continue reading this guide for simple instructions.
Naisigoo The Shiner IPL Unboxing
If you're getting Naisigoo The Shiner for the first time, the package includes everything you need for hair removal:
- One adapter
- One pair of goggles
- One razor
- A user manual
- A quick start guide
- A special letter just for you
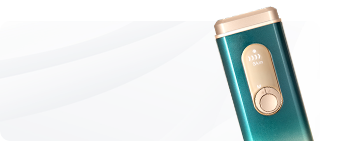
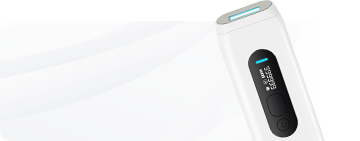
Naisigoo The Shiner, the package's main component, is an IPL hair removal device designed for at-home use. It uses a longer 550nm wavelength that penetrates deeply into the skin, ensuring maximum energy utilization on the hair follicles. This method of precise energy delivery makes it more efficient and helps avoid the energy waste commonly associated with other wavelengths, making it superior to other devices.
How to Use Naisigoo The Shiner Step-By-Step?
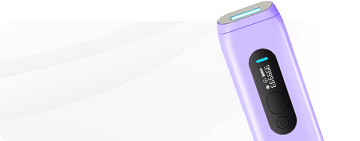
Naisigoo The Shiner is easy to use once you get the hang of the control buttons. You can use this at-home IPL device on any part of your body where hair grows. The device's modes— continuous or single flash mode—will shape your IPL hair removal experience.
Here's how to get started:
Step 1: Prepare the Skin
To ensure the intense pulses of light from the IPL device reach the hair root effectively, it's important to prepare your skin properly. This means removing any particles that might block the light. Start by using a razor to shave the area where you want to remove hair. This will help clear the way for the light to target the hair roots directly.
Step2: Plug it in
Plug the power cord into the power input connector on the product's rear. After it's connected, insert the plug into a power outlet.
Step3: Wear Goggles
Always put on goggles to protect your eyes before starting the hair removal process, especially during facial hair removal.
Step4: Press the Power Button
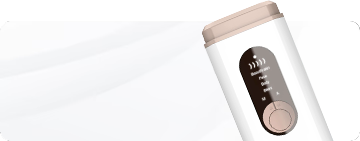
Press and hold the Power On-Off key on the back of the device for 2 seconds to turn it on. The device will display the first level when activated, simultaneously activating the cooling function and lighting up the cold compress indicator.
Step5: Select the Intensity Levels
Press the Power On-Off key shortly to adjust the device's intensity level. Six levels are available, allowing you to select the required setting for hair removal. Higher levels deliver more energy for quicker results. It is recommended to start at the first level on initial use and gradually increase to an acceptable level. Note that high levels are not recommended for dark skin.
Step6: Begin Hair Removal
Based on the target area, choose continuous or single flash modes. Position the light exit directly on the skin you wish to treat, ensuring it's applied vertically. Then, you're all set to begin your hair management journey!
Mode introduction
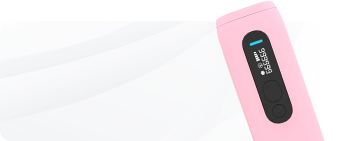
The main difference between continuous and single flash modes lies in their operation. In continuous flash mode, the device automatically emits light pulses at set intervals without manual input. In contrast, single flash mode requires the user to press the flash key for each pulse manually. Switching between these modes does not alter the technical specifications of the device.
For large areas like arms and legs, use the continuous flash mode:
- Long press the flash key for 2 seconds to activate continuous mode; the intensity level will remain unchanged after switching.
- Position the light exit flush against the skin in the area you want to treat so it fits snugly and begins to flash automatically.
- Slowly and evenly move the device over the skin, allowing it to emit flashes at regular intervals. Glide the device back and forth twice over each section needing hair removal to ensure even coverage and prevent missed spots.
- To avoid overexposure, do not treat the same area of skin more than three times in one session.
Note: Adjust your movement speed to match the flashing speed for more uniform coverage. Flash frequency is quicker at lower levels and slows down as you increase the level, affecting how fast the light is emitted.
For small areas like fingers and lips, use single flash mode:
- While in continuous flash mode, long press the flash key to switch to single flash mode. The intensity level remains the same.
- Position the light exit directly on the skin area to be treated, ensuring it fits snugly.
- Once the hair removal sensor light illuminates, indicating full contact, briefly press the flash key to start the hair removal process.
- Move the lamp head to the next area, wait for the sensor light to turn green, and press the flash key again to continue the treatment in the same manner.
Step7: Turning Off the Device Properly
After completing the hair removal, press and hold the Power On-Off key for 2 seconds to turn off the device. To avoid damaging the device, never unplug it before turning it off.
Step8: Clean and Store
To maintain optimal performance and extend the lifespan of your IPL Cooling Hair Removal Device, clean it before and after each use. This prevents the build-up of hair and dust. Always ensure the device is turned off and unplugged, allowing it to cool down before you start cleaning.
Wipe the light outlet mirror surface with a soft, clean, and dry cloth dampened with water. For more stubborn residue, use a cloth dampened with 75% medicinal alcohol. Avoid washing the device under running water or in dishwashers, and do not use steel wool, abrasive cleaners, or corrosive substances for cleaning.
For storage, always return the device and its accessories to the gift box after each use to prevent breakage or loss. Ensure the device is clean and store it in a dry, dust-free area with temperatures ranging from -10°C to 60°C.
Step9: Skincare After Treatment
Avoid water contact for the first 6 hours after hair removal, then hydrate the treated area with a moisturizing lotion. Refrain from using perfumes, facial masks, or any cosmetics containing abrasive beads.
It's essential to avoid sun exposure for 24 hours after treatment. If you must go outside, apply sunscreen to prevent skin darkening or sunburn, as the treated skin is more susceptible to UV rays. Redness, swelling, and inflammation are common, so minimize sun exposure during this sensitive period.
Do not engage in artificial tanning during the treatment process. If considering plastic surgery on the treated area, consult your doctor first.
Should you feel any discomfort or adverse reactions, contact your healthcare provider for guidance.
Conclusion
If you follow the steps provided, using the Naisigoo The Shiner IPL device at home will be simple. This device is safer than many other hair removal methods, and with regular use, you'll see results quickly.
Ready to try it? Visit our official website to purchase the Naisigoo The Shiner IPL device and get an $80 discount.
Why wait? Act now and start enjoying smoother skin!